Pesticide residue detector
Veterinary drug residue detector
Food safety detector
Food additive detector
Bacterial and microbiological detector
Food pre-treatment integrated machine
Soil and fertilizer nutrient detector
Plant Physiology Detector
Water quality detector
Meteorological monitoring station


型号:YT-TDR2
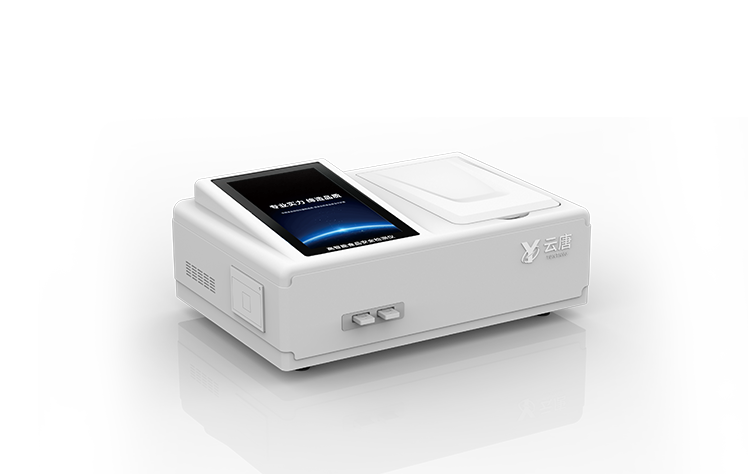
Product Overview:The soil moisture rapid measuring instrument, also known as the non-contact soil moisture measuring instrument or soil moisture measuring instrument, is a sensor ···
 technical support
Yuntang Technology
One click access to quotationWhatsApp:+86 18866361895
WeChat:+86 17865361250
Email:yuntang@foxmail.com
closeDetails
Picture and Text Introduction
Related Cases
Product Overview:
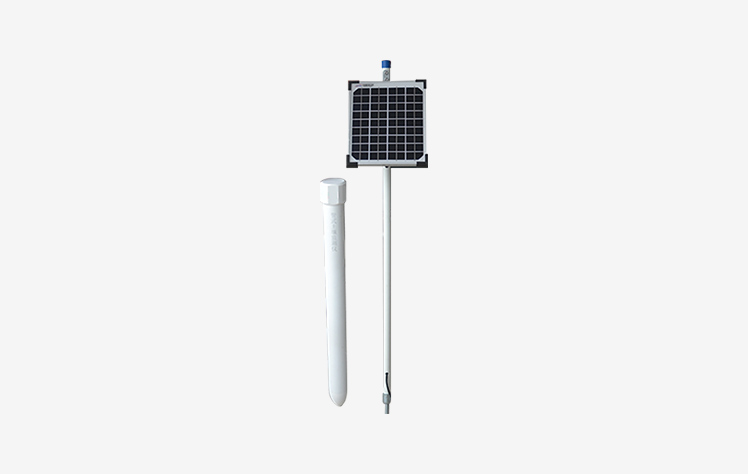
The soil moisture rapid measuring instrument, also known as the non-contact soil moisture measuring instrument or soil moisture measuring instrument, is a sensor based on the principle of dielectric constant. It can dynamically observe the soil moisture content of different soil layers, and it is a fast, accurate, and comprehensive observation that enables people to achieve a high degree of perception of the soil.
The monitoring system platform has an interface map that can locate the device's location, allowing for intuitive viewing and querying of the latest data, historical data, units, warning upper limit, warning lower limit, status, and other related information. It can also set upper and lower limit parameters and view alarm records. Can quickly export the selected data list in the form of an EXCLE table file. The platform can bind multiple monitoring station devices simultaneously.
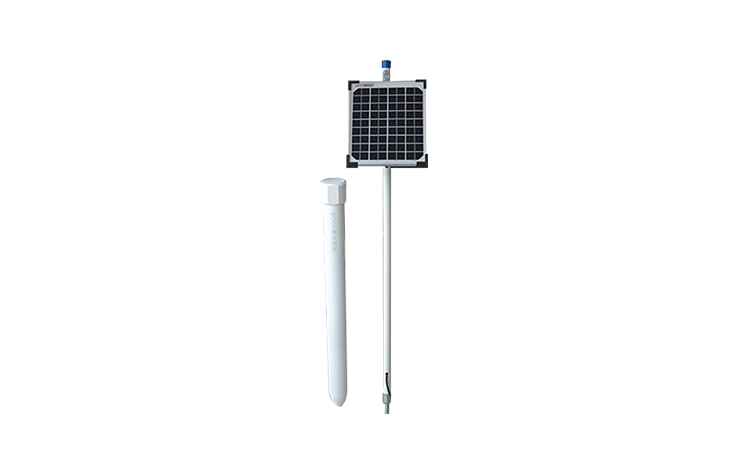
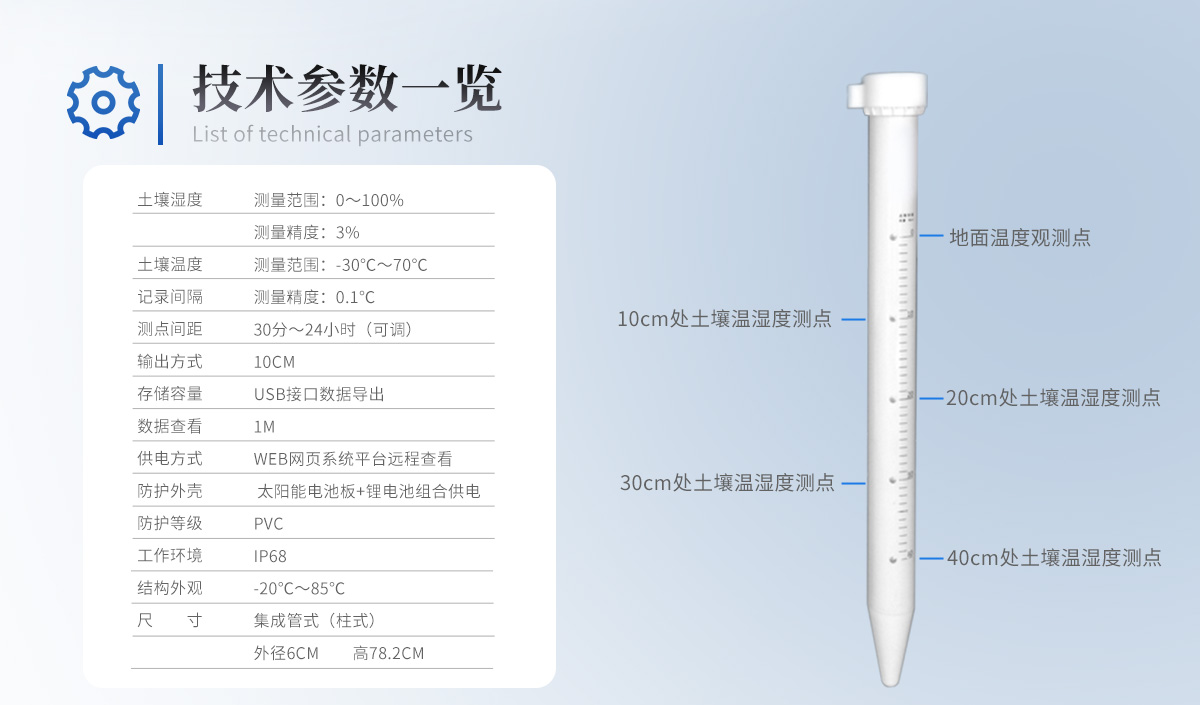
The soil moisture rapid measuring instrument adopts a layered observation structure, with a temperature observation point on the ground and a soil temperature and humidity measurement point every 10cm in the underground soil, to observe the soil temperature and humidity within the corresponding range. As shown in the following figure:
Product features:
Pre embed a plastic tube and place the main sensor inside the tube, making it easy to remove and replace the main sensor from the reserved tube. This makes maintenance convenient and has a high recycling rate.
It can move up and down in plastic pipes to achieve dynamic observation of soil moisture content in various soil layers.
Emit high-frequency detection waves of nearly 1G Hz, which can penetrate plastic pipes and effectively perceive the soil environment.
It will not be affected by salt ions in the soil, and agricultural activities such as fertilizers, pesticides, and irrigation will not affect the measurement results, with accurate data.
The electrode of the sensor does not come into direct contact with the soil to avoid interference from electricity on the soil and plants in the soil.
Can flexibly customize monitoring instruments with different soil depth intervals to meet the actual needs of different users
Technical parameters:
◆ Soil moisture
Measurement range: 0-100%
Measurement accuracy: 3%
◆ Soil temperature
Measurement range: -30 ℃ to 70 ℃
Measurement accuracy: 0.1 ℃
Record interval: 30 minutes to 24 hours (adjustable)
◆ Measurement point spacing: 10cm
◆ Output method: Supports USB interface data export
◆ Transmission method: 4G or GPRS wireless transmission
◆ Storage capacity: unlimited cloud storage
◆ Data viewing: mobile app viewing or remote viewing on PC cloud platform system
◆ Power supply method: solar panel+lithium battery combination power supply
◆ Protective shell: PVC
◆ Protection level: IP68
◆ Working environment: -20 ℃~85 ℃
◆ Structural appearance: integrated tube type (column type)
◆ Size: Outer diameter 6cm, height 78.2cm
Installation guidance:
4.1 Preparation work
4.1.1 Unpacking inspection
Check if the outer packaging is damaged; Open the box and check if the equipment and accessories are complete according to the equipment list.
Note: Soil drills are not included in the factory accessories of the moisture meter. If you need them, you can purchase them separately.
4.1.2 Tool preparation
Soil drill, purified water or tap water, water basin, gloves (prepared according to personal needs)
4.2 Formal Installation
4.2.1 Installation location selection instructions (applicable to agricultural crops)
a. Install equipment after planting crops;
b. The installation location has a flat terrain;
c. Under comprehensive irrigation conditions, priority should be given to selecting areas with less water harvesting as monitoring locations; Under local irrigation conditions, select humid areas as monitoring locations;
d. Select positions where crop growth is balanced and can represent the majority of crop growth;
e. To understand the root distribution of the monitored crop, it is generally recommended to choose a location closer to the water absorbing root system of the crop.
Attention: The installation location of the equipment should be selected at a relatively high altitude to prevent rainwater from flowing back into the equipment, causing equipment short circuits or circuit failures.
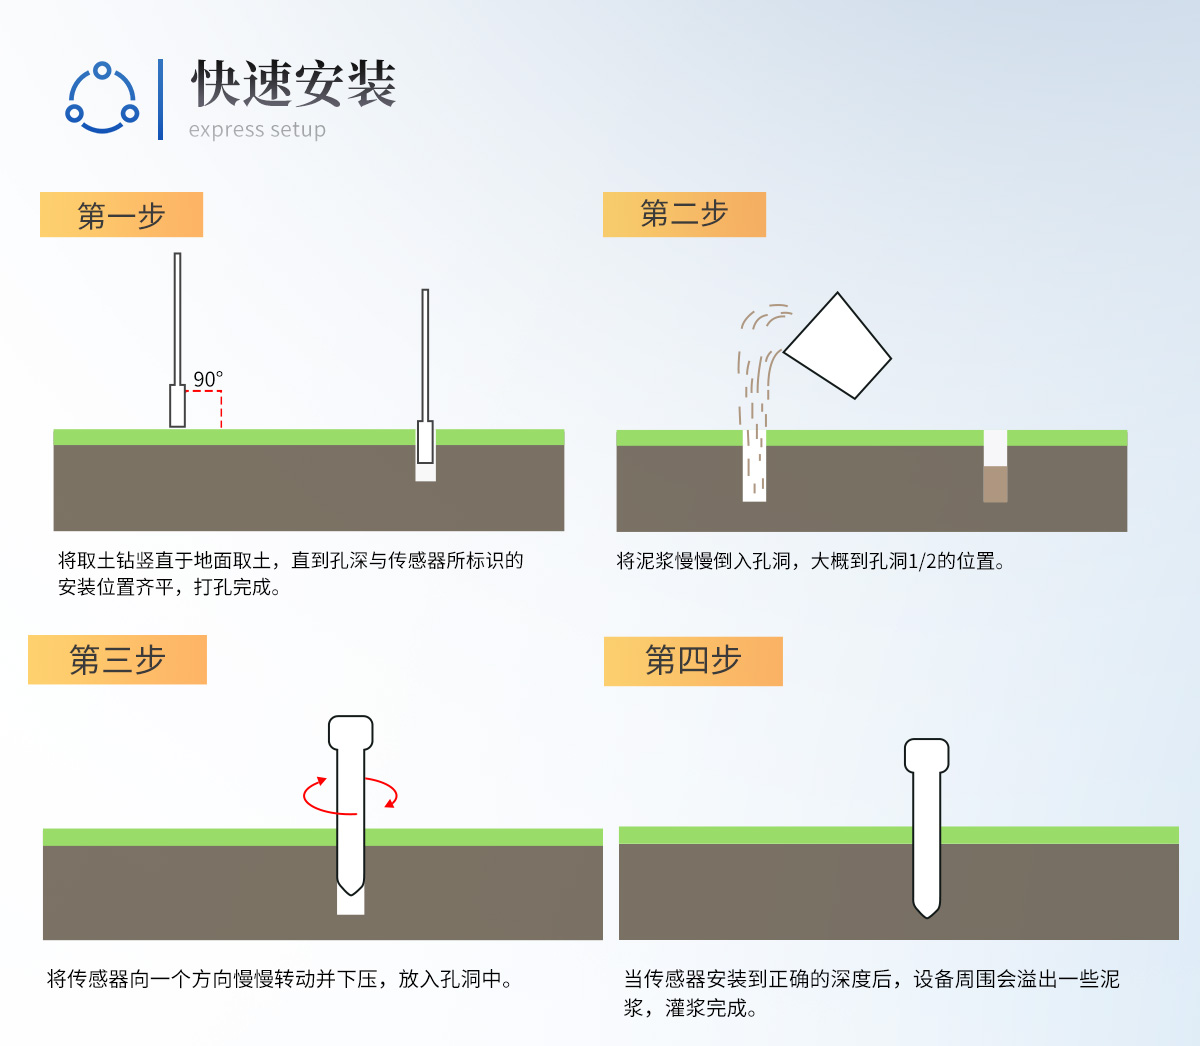
4.2.2 Punching
a. Drill bit, handle, and support rod of the soil drill. After completion, place the soil drill vertically on the ground and hold the handle tightly with both hands. Press down clockwise and rotate slowly. (Note: Do not apply too much force, be sure to rotate slowly and make a few more turns to prevent the drill bit from deviating and causing the hole to tilt)
b. Take out the soil drill from the hole and place it in a basin. Use tools to collect the excavated soil into the basin for mixing with mud. (Note: Due to excessive impurities during the initial drilling, no collection will be conducted.)
c. Repeatedly drilling and soil sampling as mentioned above, and attempting to gently place the sensor into the hole during this process (do not forcefully touch the device to the bottom) to test whether the depth of the hole is appropriate; If there is any lag, use a soil drill to correct it and ensure that the sensor is inserted and removed smoothly; Until the hole depth is flush with the installation position marked by the sensor, drilling is completed.
4.2.3 and Mud
a. Pick out soil impurities, stones, roots, and insoluble soil blocks from the pot. Rub the soil fine to mix with the mud.
b. Pour in an appropriate amount of water and stir thoroughly until it becomes viscous; Loam mud generally cannot be thicker than sesame paste; Completed with mud.
4.2.4 Grouting installation
a. Slowly pour the mud into the hole, about 1/2 of the hole; Adjustments can be made based on actual circumstances.
b. Slowly insert the sensor into the hole, rotate it slowly in one direction and press it down. If the speed is too fast, it may cause the bubbles to not be completely discharged. (Note: During the process of rotating and pressing down again, the sensor should not be pulled up or down to prevent gas from being sucked into the hole again.)
c. When the sensor is installed to the correct depth, some mud will overflow around the equipment, and grouting is completed; At this point, the installation depth of the sensor is flush with the opening. (Attention: Remove excess mud outside of 3CM around the sensor to prevent clumping and water infiltration)
4.2.5 Installing solar panels (users who do not require solar panels do not need to operate this step)
a. Site selection for solar panels
The installation position of the solar panel should be as far away from the sensor as possible. Generally, it is more suitable to be 50cm away from the smart sensor, but it should not exceed the length of the power cord. The panel of the solar power supply panel should face towards the direction of the sun, that is, south, and the front should be as unobstructed as possible.
Insert the solar panel bracket into the selected position.
b. Fixed solar panels
Fix the solar panel panel to the bracket, align the four holes in the middle of the panel with the four holes on the bracket, and then tighten them with screws.
c. Connect the solar power supply panel to the measuring instrument
Firstly, connect the wiring terminals on the panel and bracket together and screw them together;
Secondly, to connect the solar interface of the device, you need to pull out the top cover of the device upwards. On the opposite side of the opening key is the solar interface (aviation jack); Align the other end of the power cord on the bracket with the interface and insert it. Tighten the bolt to complete the installation of the solar panel.
4.2.6 Installation completion
After pulling out the top cover of the device upwards, press the switch button, and the device will work normally. It is recommended to resume normal operation after the mud has returned to its normal state.
Other precautions:
Key points for sand and soil installation
The installation steps for sandy soil are no different from those for loam soil. It should be noted that sufficient water should be prepared, not less than 5L; Before grouting, pour water into the hole and wet the entire wall until excess water appears at the bottom of the hole. Then follow the steps and slowly pour the mud into the hole, about 1/2 of the hole. The remaining installation steps can refer to the installation of loam soil.
Key points for clay installation
The installation of clay is carried out after drilling holes to collect soil, cleaning impurities, and soaking the clay in water for more than 4 hours to soften it and facilitate the formation of a relatively uniform slurry. After soaking, stir until it becomes viscous, and then grout. The remaining installation steps can refer to the installation of loam soil.

WeChat:+86 17865361250
WhatsApp:+86 18866361895
Email:yuntangzhineng@foxmail.com
Copyright @ 2019-2022 Shandong Yuntang Intelligent Technology Co., Ltd All Rights Reserved. Copyright Source manufacturer of pesticide residue detector, food detector, bacteria detector
 WeChat


TOP
 Leave us a message